Posts

Showing posts from December, 2020

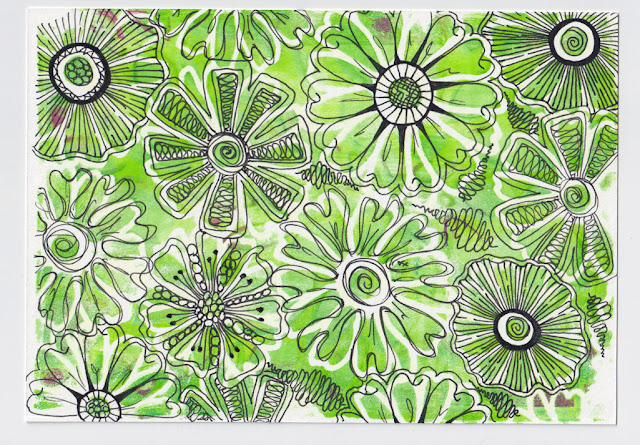
Alcohol Ink on a Gelli Plate

Image
  So I am trying something new. And though I did not get the results I expected, I really like the way these three backgrounds turned out. Birgit Koopsen with Gelli Arts recently had a post about using alcohol ink on a gel printing plate. I thought her idea was crazy but she got some absolutely beautiful results! Hahaha! Who knew! So I figured I would give it a go.  I watched her video several times and took loads of notes, then jumped right in. I decided to go with my Brea Reese Alcohol Inks. Just three colors. One for the base and two for the stencil. And my 5" x 7" gel printing plate from Gelli Arts.  I began with the cadmium yellow and squeezed out two drops of color. I actually tried one print before this one. It now resides in my trash can. But. What I learned from that experience is . . . less is enough. Just two drops of color.  Then I took my brayer and rolled the color out all over the printing plate. You can't see it well in this photo, but the entire plate is

A Tangled Gel Print

Image
  For the past week we have learned about gel printing, different techniques to try, different ways to use your prints. Today let's talk tangling. Tangle Talk. Yep. But first - how did I make this print.  I started with a 5" x 7" Gel Printing Plate from Gelli Arts and their 4" wide brayer . In this photo you can also see the 6" x 8" acrylic block I purchased at Joggles. Instead of the Nostalgie postcards you see, I used Bristol Illustration paper from Hahnemühle for this project.  I placed my gel printing plate on the acrylic block to get started. This turns your printing plate into a stamp, which comes in handy when you are printing something that is not easy to place face down on the gelli plate. I began with a layer of brilliant green acrylic paint from Amsterdam. Just a couple drops and rolled out with the brayer. This is a really lovely stencil I received from Gelli Arts. Stencils act like a mask with printing. Because I had a relatively clean pla

Marbled Monoprinting

Image
  All week long we are talking about monoprinting . Gel printing is called monoprinting because you never get the same results twice. Every print you make is unique and individual and one of a kind. Recently I was playing with some smaller gelli plates and came up with a technique I named Marbled Monoprinting. Let's learn all about it today with one specific project I made.  I have several gelli plates. Uh, several, yep! And they are various shapes and sizes. And every one of them came from Gelli Arts . To marble, there are basically three steps. I'll go through them briefly at first to give you an idea, then go a bit more in-depth and show you my project.  Step One: I used a variety of small gelli plates for this project. The first plate I used is 2.5" x 2.5" - I put one small drop of four different colors on the plate. That is all it takes. Please excuse the plate's appearance, I never clean them.  Remember you can click any of these photos to enlarge them.  Ste