Marbled Monoprinting

All week long we are talking about monoprinting. Gel printing is called monoprinting because you never get the same results twice. Every print you make is unique and individual and one of a kind. Recently I was playing with some smaller gelli plates and came up with a technique I named Marbled Monoprinting. Let's learn all about it today with one specific project I made.

I have several gelli plates. Uh, several, yep! And they are various shapes and sizes. And every one of them came from Gelli Arts. To marble, there are basically three steps. I'll go through them briefly at first to give you an idea, then go a bit more in-depth and show you my project.
Step One: I used a variety of small gelli plates for this project. The first plate I used is 2.5" x 2.5" - I put one small drop of four different colors on the plate. That is all it takes. Please excuse the plate's appearance, I never clean them.
Remember you can click any of these photos to enlarge them.

Step Two: With a small brayer, tap and roll out those colors. Use short strokes, not long one like you normally would with a gelli plate. Just touch the brayer to the color and make short rolls here and there around the plate. I brayered all four colors, a little here, a little there. Try not to blend the colors together, but keep them in separate blobs like you see in the photo.

Step Three: Take that gelli plate with the color rolled out and stamp it directly onto your paper. I will show you in a minute how to do that. Stamp straight down, lift straight up.

And there you go. A marbled mono print. OK, let's build this project from start to finish.

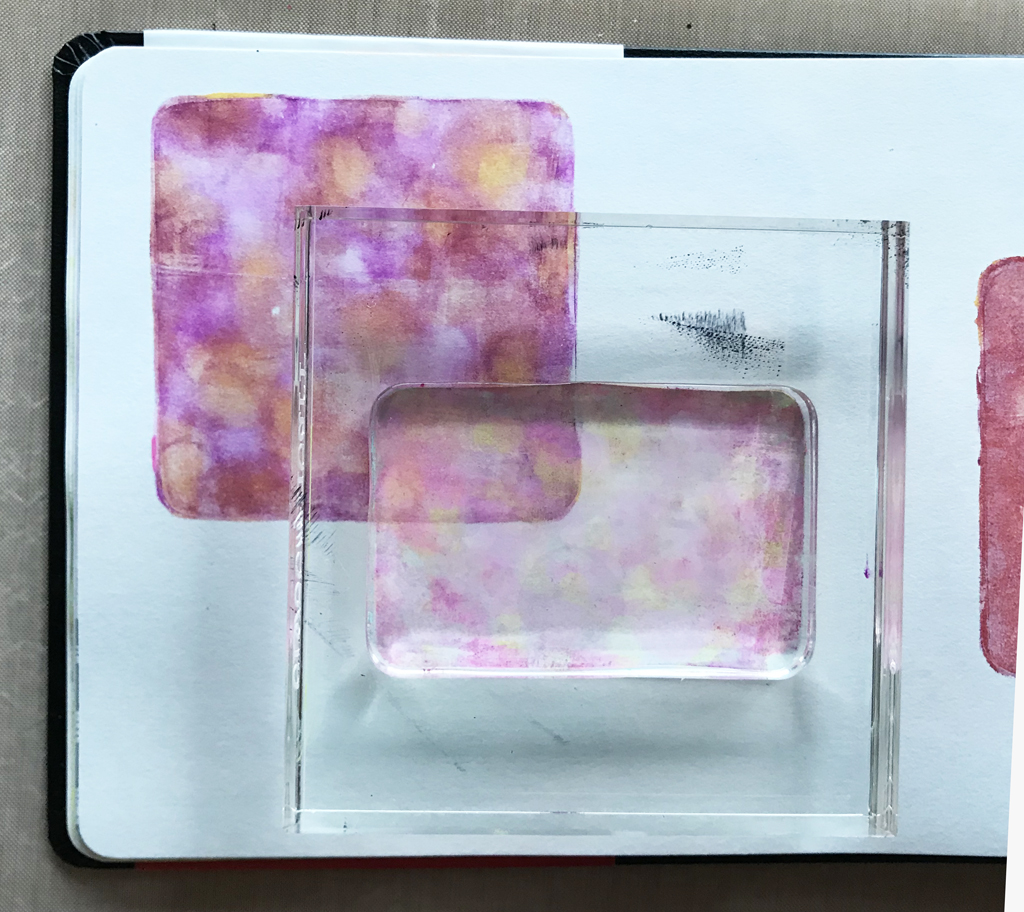
I used four of my baby gelli plates from Gelli Arts to make a two page project. You see two of them in the photo, along with a small brayer and some acrylic color. I worked in my Report & Art Book from Hahnemühle, but any paper you want to use will work just fine. I use a small brayer when I marble - the roller bar on this one is 2" wide. Small works best for this technique to keep from mixing your colors together too much. Small brayer, small taps and rolls. Any acrylic or craft paint you have on hand will work. Here I used bottles of Dina Wakley's acrylic paint. You use so little color these bottles last a long time. Your absolute need to have supplies? Gelli plate, paper, brayer and color.

Back in the day when I did a lot of scrapbooking and stamping, I had these acrylic blocks in a load of sizes. And I kept them even when I got rid of just about everything else. I took my little gelli pate and stuck it on an acrylic block, affectively turning the plate into a stamp.

Isn't that color wonderful? I knew I was going to work over a two page spread and my tangle brain told me to start with the square plate. I used four colors on most of the blocks on these two pages. One little dollop (how's that for a technical term?) of each color on the plate somewhere. Doesn't matter where. And you can throw preciseness out the window. Just slap the color on and grab your brayer. Tap and roll that color here and there trying not to mix it all into mud. Cause that stinks. If you do make mud or something equally undesirable, print it with a piece of scrap paper and start over. Another plus for using the acrylic blocks to stamp with - you can see exactly where you are placing the gelli plate. Smoosh it down good like you would a stamp, then lift the block and plate away from your page.

Don't worry about cleaning your gelli plate. You don't really need to. All those leftover bits of color add character to later prints. Hahahaha! I went way too dark on these colors. Eek! But look at that brayer. Maybe that will help you understand tap and roll a little better. You can see I was grabbing bits of color and rolling about an inch at a time.

Like I said, this came out darker then I like, so I added a thin layer of white paint and stamped that right on top. I could line it up just right thanks to the clear acrylic block holding my gel plate.
I won't show you the gel printing plate each time but do look at this one. Do you see how little paint is on it? It really doesn't take a lot. I stamped down and . . .

. . . this is how it turned out. Plenty of color. That dark edge came from previous pulls and I am pretty much always ok with that.

I used rectangles, squares, ovals and whatever a six sided shape is called. Hahahaha! Geometry was not my thing. And see how I overlapped shapes? It all works and it is all beautiful!

I started with two colors on this plate, then decided to add two more. This rectangle is 3" long by 2" wide. So you can see how small those bits of paint really are.

Then I just stamped it in place. If you don't get good enough coverage with your first print - put the gelli stamp right back into place and smoosh it down harder. Hahahaha! Art play is such a rocket science experiment for me.

You really can just layer these pieces as you go along. The paint dries so fast the color will not mix. They will stay just like you put them down.

Aren't this colors wonderful? Keep working till you feel the composition is complete. Notice how that red square in the center covers the middle seam and is on both pages in my journal? Hahaha! I didn't know if that would work like I wanted it to, but it did.

Don't be afraid to stamp off the page. Go for it. Just like you did with scrapbooks and stamping 20 years ago.

This is where I called it done √ and I love it just as it is. Was I afraid I'd mess this up if I drew on it? You bet I was worried about that! Hahahaha! Shoot, it isn't every day I make something this beautiful. But. I'm all about tangling and such so I figured I needed to at least try.
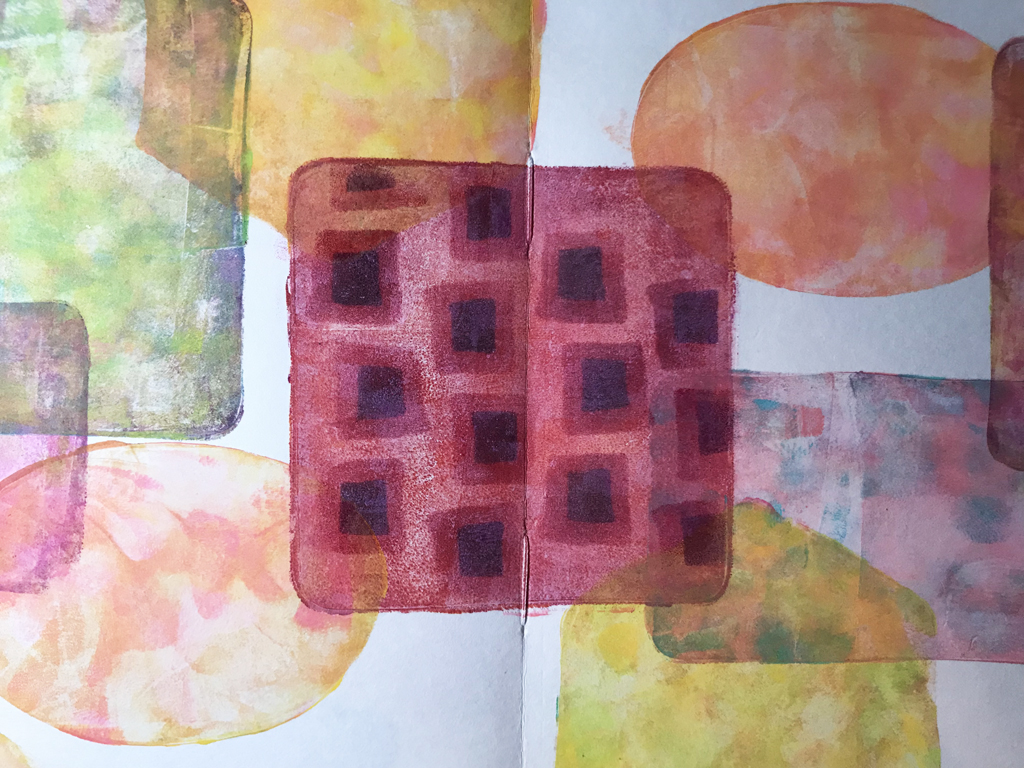
This came about while I was in serious use-up-all-those-stencils-in-the-drawer mode. See what I did in that center box? The one that looks like a waffle? Let me show you how I did that.

Here I was working on that 6-sided wonder there in gold. These stencils are so awesome! This particular one is called Circles. I used an ink pad and dabber to put color just where the stencil covered the gold shape.

When I lifted the stencil this is what I had.

From there you just slide the stencil over - see the circles to the left? And line up the right hand side of the stencil - smaller circles - so they fall right in the center of the larger stamped ones. Then use a different color ink for these.

And you get this. Fun, yes? They look like olives. Hahaha!

Here's another I did with a similar stencil. Awesome! And that's also how I made the waffle block.

Here you can see how the three blocks I made with the stencils look when mixed in with the rest of the two page blocks.

I used my technical drawing pens from Zebra Pen and started adding some tangles. I opted to use more open patterns that would allow the pretty colors to show through.

I added some thicker lines around some of the squares . . .

. . . and some checkerboard lines for this one.

A little line dance allowed the center of this block to remain open to show those pretty colors.

Where some colors overlapped I just ignored those and went with the general shape of the main piece.

And some overlaps I worked around and changed up the shape of the block I was tangling.

Left hand side . . .

. . . right hand side . . .

. . . and both pages. I limited my tangles to three patterns and kept them light and airy. I left my two favorite blocks open with no tangling at all so I could appreciate the beautiful color. Marbled monoprinting is so easy to do. And great fun! Let me know if you have any questions in the comment section. I hope some of you will try this technique. It reminds me so much of batik fabrics - which I love also!
I left links all along the way through this post. All those little pink words are links to the products I used.


So beautiful, Alice! I'm always in awe when I see your work!
ReplyDeletethanks, sandra, this one was fun! tomorrow I am going to try some other things - something I've not tried before. alcohol ink on gelli plates. I know it can be done and I need to learn how.
DeleteThese are beautiful! I love seeing the step-by-step process you went through. Very interesting and inspiring!
ReplyDeletethank you, this is one of my favorite ways to gelli print
DeletePhew - I'm finally caught up with your posts! Again the limited number of tangle patterns works perfectly on the very busy colourful pages. The technique looks intriguing & messy, hope Aurora manages to keep clear of any colour. Those two square marbled blocks top left & bottom right are my favourites.
ReplyDeletemy favorites, too :)
DeleteThanks for the tutorials!!....the shapes look fabulous. I will definitely need to give this a try. Do you have any trouble drawing over the acrylic paint?....should I use any special pen or ink? Thanks again...❤️
ReplyDeleteI haven't had any trouble. the trick is not to get your paint too thick. go with thin layers. on these I used an 01 technical pen from Zebra. that's the same as a micron 01. recently I've started using the Ultra Fine tip of a black Sharpie. just experiment with what you already have then see if you need to try something else. I've also used the Tombow Mono drawing pen with great success
Delete