A Hahnemühle and Gelli Arts Partnership

Fair warning: this is going to be a photo packed post! Enlarge any photo just by clicking on it.
Gelli Arts and Hahnemühle recently teamed up and I was fortunate enough to be asked to join in. Gelli Arts provided the gelli plate and tools and Hahnemühle provided the substrate. I'd love to show you what I made for my first project. And I have to tell you it took me four days to complete. I was having so much fun I did not want to stop!

Gelli Arts gave me a 5" x 7" gelli printing plate, a brayer, some mark making tools and some stencils. Hahnemühle gave me various papers including this post card set you see. The item on the far left I purchased from Joggles. I will get to it in a minute.

I practiced on a lot of papers first, including those post cards. For the project I want to show you today I used the roughly 5" x 7" ZigZag book from Hahnemühle. It has accordion pages inside and folds out to the neat setup you see in that first photo at the top. Eighteen work surfaces total.

I had recently gotten interested in Zetti Art. A basic understanding of Zetti Art (thank you, Mr. Google) is taking parts of human or animal bodies and mixing them with fantasy items, things they wouldn't normally have. I did one Zetti project before this one and couldn't wait to get started. I gelli printed all the pages in my ZigZag book first, then pulled out my zetti supplies to get started. Dina Wakley's Collage Collective has some great pieces. Dyan Reaveley has several art journal items that work and Studio Light Art by Marlene has a load of great pieces. I believe I need at least one of each.

I had never gelli printed in an accordion book before and was concerned about making a big mess. Hahaha! About getting paint where I didn't want it to be, about my book closing on me at the wrong time, I was a nightmare waiting to happen. Then I had a brilliant idea. What if I could use an acrylic block and turn this gelli plate into a stamp??????? Don't you know Joggles has everything? I started looking for a 5" x 7" acrylic block and Barb had one that was close. I ordered their 6" x 8" block thinking I could use that extra room on the sides to keep my hands mostly clean. Hahahahaha! And it worked great! I placed my 5" x 7" gelli plate right on the acrylic block and rolled out my color.
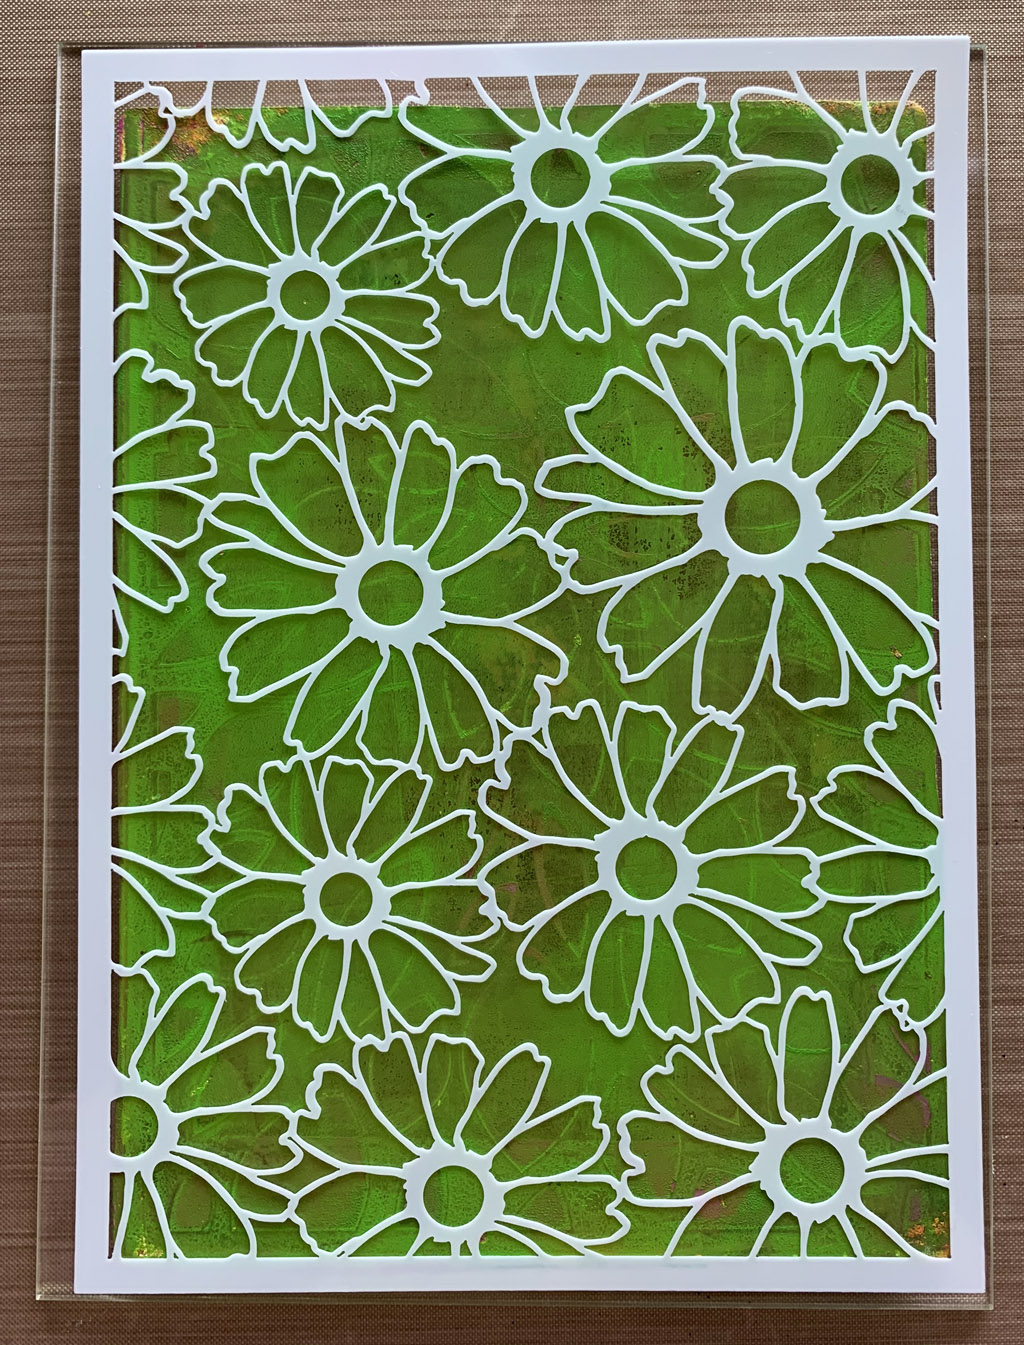
I used a really great stencil that Gelli Arts gave me and basically just lifted some color away with the stencil. Nothing fancy.

After lifting the stencil away this is what I had on my gelli plate. Isn't it cool?

Then I picked up that whole component of block and gelli plate, flipped it over and printed a page in my book. Which you can't see well here because I have most of it covered up. Years ago I cut up a craft mat into pieces I could use as page protectors. I placed one over the page on the left. And I placed another under the right hand page which I was printing. That way I didn't get green flowers on other pages. Once I had the 'stamp' in place I applied a lot of pressure to print the image onto my book page.

And this is how it turned out. Because I protected the opposing page with a piece of craft mat, my green flowers stayed where I wanted them.
I can hear you wondering where all that other color came from. The bits that are not green. Call me a rebel but I never clean my gelli plates. Ever. I know how to, I just don't do it. I like the added texture I get - and even designs sometimes - from the residual bits underneath the new layer.
And that is how I stamped/printed this entire book. Let me show you pages before and after Zetti Arting happened.

Inside the front cover. Notice I have a couple white places where I did not apply enough pressure for the print. Mostly that is due to the nature of my substrate being a book and not a flat paper on a countertop. I didn't mind the white spaces because I knew my added art would cover parts of it up and the rest would just be added interest. Let me show you how I Zetti-fied it.

From the gelli print to this. Throughout the book I used a lot of sarcastic sayings that are part of the Dylusions line from Dyan. That sweet little Baby Yoda came from the Amazon Christmas catalog. Before I started added collage work, I went through the entire 18 pages and added some mark making. I used stencils and dabbers and ink, dot pens, Paint Over Pens, Sharpie paint pens, a fountain pen, Ladybug Dotters, Wink of Stella pens, gel pens, you get the idea. Pieces were adhered either with Scor-Tape or my sticker machine.


Sometimes I add scrapbook papers, even leftover bits of previous gelli prints. I cut heads off bodies and glue other heads in their place. Sometimes I add different eyes or noses or mouths. Other legs or arms.


And there you go. Before and after for all eighteen Zetti Art/ Gelli Print spreads in my ZigZag Book. I love just sitting here looking through the pages. Yes, I am a dork but I am happy that way. Hahahaha! So many of these 'sarcastic' statements I used on the pages could be what I'm thinking at any given time. But I am too nice to say them out loud. Hahahahahahah! Now you know. So, from that first picture up top of my ZigZag Book waiting to be gelli printed and Zetti'ed. This is what I see and I love it!

Front spread.

And the back spread.
So, how did these two products work together? Excellent, as you can see. I had no problems at all gelli printing my ZigZag book. None. The paper in the ZigZag is sturdy and held up to all I threw at it. As far as the Gelli Arts products - I used them all at some point in this project. And I love them all. Gelli printing is so much fun and there are so many different ways to do it. Over the next couple weeks I hope to show you a whole lot more! And maybe even share a little product with you in a giveaway real soon! Thanks to Carol Boss with Hahnemühle and Tracy Weinzapfel with Gelli Arts for allowing me to play and to share with you!
You can purchase Gelli Printing plates from Gelli Arts by clicking here.
ZigZag Books from Hahnemühle can be purchased by clicking here.


The ZigZag is perfect for the GelliArts backgrounds. I never get such clear patterns as you do, no matter what paper I'm using - you're the mistress of the printing plate! It's just as well that I don't because I always blur some of my backgrounds when I paint on it.
ReplyDeletewe just work differently :) I really had fun making this book
DeleteOh my, you are going to have Teesha Moore envy you on this great idea and tutorial. I think I am going to give this a spin with the set of Hahnemuhle Bamboo papers I won from you!!!
ReplyDeleteWhat wonderful praise. Thank you! Have fun. I’d love to see what you do ❤️
DeleteWow, so beautiful and fun dear Alice ❤️
ReplyDeletethank you, regina, it was so much fun! I may need to make another one <3
DeleteNo wonder you can sit for hours looking at a page - there are so many elements which I can see you combine intuitively. Don't think my brain has a 'tab' for random! Had to laugh at that page particularly.
ReplyDeletethis was so much fun to make! I have a square zigzag book and a square gelli plate. hmmm. I may need to do something with those. hahahahaha!
DeleteFantastic beautiful. I love this book dear Alice. ❤️❤️❤️
ReplyDeleteThank you so much, Regina! Merry Christmas!
Delete