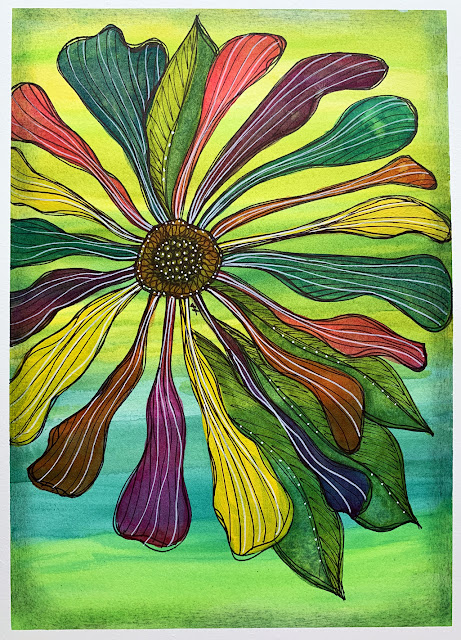
A Green Rainbow
How is that for a title? Hahahaha! When I set out to paint this flower I knew I wanted to use a lot of different colors. That was pretty much all the plan I had in mind.
Last week Mark was in the Everglades enjoying his annual fish with the buddies trip and while he was gone I painted. A lot. For this one I broke out a block of The Collection hot pressed watercolor paper from Hahnemühle. Its smooth surface was perfect for these gentle side to side washes of green and yellow. I pre-wet the page first, then used a #8 flat Black Tulip brush from ZenART Supplies and just relaxed. This was the first time I painted on the Collection hot pressed and I really liked the feel of it.
My entire plan with this page was to use several colors. For painting I used a #8 round Black Tulip brush from ZenART Supplies. I just could not get that yellow to show so I added a layer of gesso over those petals, then added some yellow acrylic to get the yellow petals to work. I really like using the double messy lines to cover up boo-boos with the painting and drawing. Hahaha!
This particular floral design is based on a lesson I had with Tracy Weinzapfel. I have learned so much from her.
The white was done with a Sharpie paint pen. I really like their paint pens, they show up on everything! Notice that I draw and paint right across that painters tape.
To complete my green rainbow floral I finished off the edges with some Tahiti Dyestress Ink and removed the painters tape. I love the yellows behind the flower - it looks like my flower is glowing. This type of petal and leaves are so forgiving when you draw. Just do it and it will be lovely. Honest.
The Collection papers from Hahnemühle can be purchased here.
Black Tulip paint brushes from ZenART Supplies can be purchased here.


Alice, I've been loving all your flower paintings lately, and this one is no exception. Thanks for explaining how you achieved visible yellow ... on top of yellow! I wouldn't have thought to use Gesso, then acrylic over that. Brilliant! And it sure does work. :)
ReplyDeleteGesso makes a solid base.
DeleteVery striking - the background looks like a stream with a grassy bank in the foreground & fields behind the water with glowing sunshine. It does make your flower glow/shine whatever it was you did & those double lines are so so effective. This is a terrific extension of your style & I can see you are loving settling into your own groove with these techniques you've been learning.
ReplyDeleteI think that glow is due to all the yellow I used underneath. I am having so much fun working art like this
DeleteThis is soooooo beautiful!
ReplyDeletethank you so much! unusual colors for me to work with BUT I love it
Delete